If you love the idea of snow-dusted pines, a wood-fired hot tub and a glass dome above your head, but you dread the thought of shivering through the night in a tent, you’re not alone. That fear keeps a lot of travelers from trying glamping in winter, and it’s mostly a solvable problem. The difference between a miserable night and a magical one usually comes down to the stay you book and the way you prepare for it.
This guide walks you through both. We’ll look at why the colder months often beat summer for value and atmosphere, how to pick a genuinely winter-proof dome or cabin, and what to pack so your body stays as warm as your surroundings. Then we’ll cover safe wood stove use, sleeping warm until morning, and how to plan your arrival around short winter days. Follow along, and a snowy night under canvas starts to sound less like an endurance test and more like the best room you’ll ever book.
Why Glamping in Winter Beats the Summer Crowds
Winter is when glamping sites show off their best side. A fire pit crackles better when there’s frost on the ground, a hot tub under the stars feels like a small miracle in the snow, and a dome glowing from the inside turns a plain field into something out of a postcard. Summer photos of the same sites rarely compare.
Timing matters more than you think
The winter glamping season typically runs December through February in the Northern Hemisphere, but not every week is equal. The stretch from mid-December to mid-February includes the holiday rush, when rates climb and weekend availability shrinks fast. Aim for the edges of the season or midweek dates, and you’ll often find better rates and a much easier booking process than in the peak holiday weeks.
There’s a quieter bonus too. With fewer guests on site, everything slows down in a good way: no queues for the fire pit, no noise carrying between domes, and hosts who actually have time to talk you through the stove, the trails and the best local dinner spot. Many travelers find the personal attention alone is worth choosing a January weekend over a July one.
So if you’ve been putting off a winter trip because it seems like the busy, expensive time, the opposite is often true. The right dates give you better value, more space and the most atmospheric version of the property you picked.
Choosing a Winter-Proof Glamping Stay
Not every glamping structure is built for real cold. A summer safari tent with a space heater is a very different proposition from a four-season dome designed for snow, so start by reading the property description carefully. You want structures explicitly listed as four-season, with insulated flooring, rated for temperatures down to about -20°C (-4°F). If the listing doesn’t mention insulation or a temperature rating, ask the host directly before you commit.
Heating is the second big filter. A wood stove, underfloor heating or a hot tub should be listed as standard for your unit, not as an optional add-on you discover at check-in. An add-on hot tub in January often means an extra fee and a cold walk to reach it.
- Check the stove details. Ask whether the wood stove is included, whether firewood is supplied or sold on site, and whether the stove heats the whole unit or just one zone.
- Ask about snow access. Confirm whether the path to your unit is cleared and gritted after snowfall, and whether staff are on site overnight if something goes wrong.
- Look at the windows. Double-glazed or storm-rated panels make a noticeable difference in domes and tents; single-layer clear panels can feel cold to sit near.
- Read recent winter reviews. Reviews from guests who stayed in the cold months tell you how the heating actually performs, not just how it’s advertised.
Finally, book early. For weekend dates between mid-December and mid-February, plan 2-3 months ahead, when rates usually run $150-400 per night and the best-heated units go first. Late bookers often end up with the least-insulated options left on the calendar.
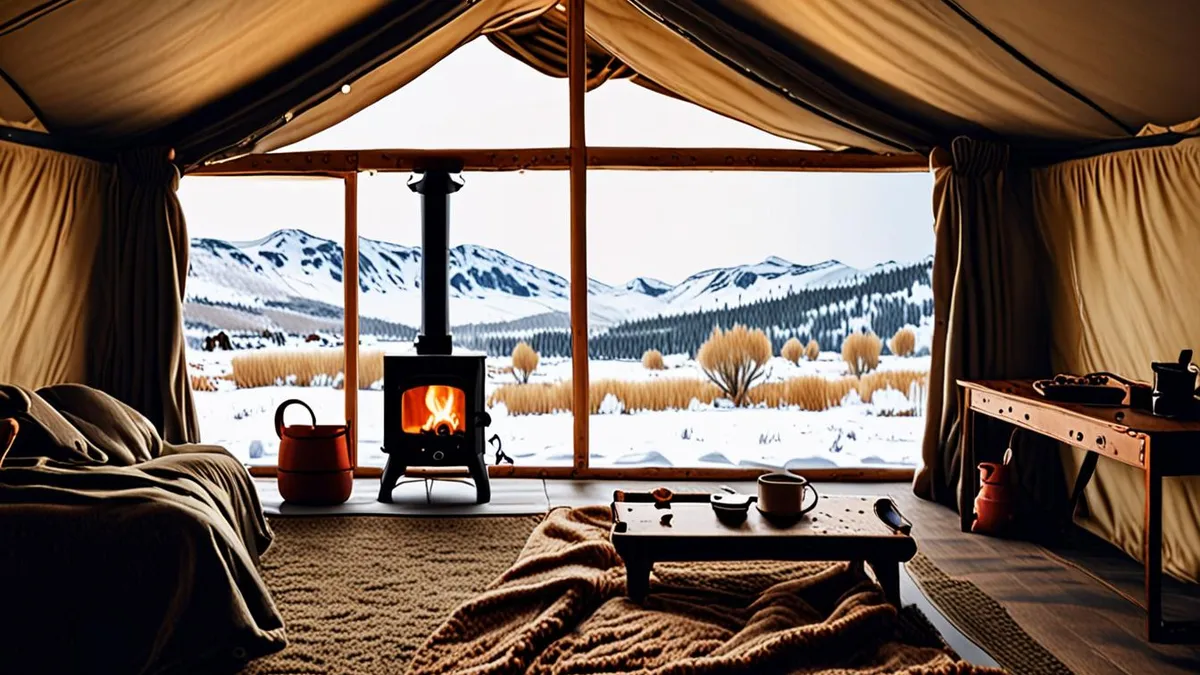
Packing Layers for Glamping in Winter
Staying warm outdoors starts with how you dress, and the golden rule is layers you can adjust rather than one heavy coat. Use a three-layer system: a moisture-wicking base layer against your skin, an insulating mid-layer such as fleece or wool, and a windproof shell on top. Sweat is the enemy in cold weather, so skip cotton base layers that stay damp and choose merino wool or synthetic fabrics instead.
Your extremities deserve extra attention, since most heat is lost through the head and feet. Pack several pairs of wool socks, a beanie you can sleep in, and insulated waterproof boots with decent tread for icy paths around the site. Gloves and a scarf round out the kit and take up almost no space in your bag.
- A headlamp with spare batteries. You’ll need hands-free light for wood hauling, stove tending and trips to the bathroom, and cold drains batteries faster than usual.
- Slip-on shoes or sandals for indoors. Insulated boots are clumsy inside a dome, and a warm pair of slip-ons keeps the trip between bed and stove comfortable.
- A spare base layer set. Changing into dry layers after a hot tub session or a sweaty hike makes the evening far more pleasant than lounging in damp fabric.
- Lip balm and hand cream. Cold air and wood stove heat dry skin out quickly, and chapped lips can sour a otherwise great trip.
One more reason to be organized: winter daylight fades by around 4:30-5:30 pm at mid latitudes. Pack your bag so that headlamps, gloves and spare layers are easy to find in the dark, and you’ll spend your evenings relaxing instead of rummaging.
Heating Your Tent or Dome Safely
A quality wood stove is the heart of most winter glamping setups, and it earns its reputation fast. In a dome of 20-25 m², a small stove can raise the interior temperature by 15-20°C within about an hour. That means you can go from shivering to shirt-sleeves comfortable during a single evening, provided you feed it dry, seasoned wood. Ask your host whether firewood is included; if not, buy kiln-dried logs locally rather than burning damp wood that smokes and burns poorly.
Keep the Fire Where It Belongs
Stove safety in a canvas or fabric structure comes down to a few simple habits. Flammables — clothing, sleeping bags, paper, spare wood — should stay at least a meter from the stove at all times. A spark screen on the door helps, and a small mat of stone or metal around the stove gives stray embers nowhere to land. Never leave the stove burning while you sleep; let it burn down to ash before you turn in, and close the stove door fully so embers stay contained.
Airflow matters just as much as the fire itself. Crack a vent or window slightly, even on the coldest nights, so fresh air keeps moving and carbon monoxide has nowhere to build up. If your stay doesn’t include a stove, some hosts offer units with underfloor heating or a hot tub as standard — and if you’d rather skip the tent entirely, a warm-design hotel like a stay at The Battery in San Francisco shows how creative lodging can be just as memorable. Whatever you choose, treat the heat source with respect and it will treat you well.
Sleeping Warm Through the Night
The coldest hour of a glamping trip is usually the one right before dawn, when the stove has gone out and the ground has pulled heat away for hours. The fix is a layered sleeping system. An insulated sleeping mat combined with a winter-rated sleeping bag adds roughly 10°C of warmth compared with a bag alone, because the mat stops your body heat from draining into the ground or platform beneath you. If the stay provides bedding, ask whether there’s an insulated layer under the mattress — many four-season domes have one, but it’s worth confirming.
What you wear to bed matters as much as what’s under you. Change into dry base layers before climbing in; the clothes you wore all day hold moisture, and damp fabric chills you quickly. A few extra habits can make the difference between a restless night and a deep one:
- Tuck tomorrow’s clothes into the bag with you. Body heat overnight keeps them warm, so getting dressed at dawn is far less painful — and cold clothes sit farther from your core, letting the bag trap heat more efficiently around you.
- Vent the bag slightly if you sweat. Unzip the foot box a crack if you run hot; trapped perspiration dampens the insulation and lowers the bag’s effective temperature rating over the night.
- Keep a snack within reach. Digesting a handful of nuts or a chocolate bar before sleep gives your body fuel to generate heat through the small hours, when blood sugar and core temperature both dip.
One last touch: fill a hot water bottle about 30 minutes before lights-out and slide it toward the foot of the bed. It pre-warms the coldest part of the bedding, and by the time you climb in, the bag already feels like a hotel bed rather than a survival test.
Planning Your Arrival and Daylight Hours
Winter days are short, and at mid latitudes daylight often ends around 4:30-5:30 pm. That single fact should shape your whole glamping itinerary. Fumbling with tent poles, firewood and headlamps in the dark is nobody’s idea of a holiday, so plan your arrival around the sun rather than the clock. This matters even more in winter than in summer, because the usable window for setting up, cooking and exploring shrinks dramatically. A little structure goes a long way:
- Target an arrival at least 2 hours before sunset. This gives you daylight to unload, find the light switches, figure out the stove and unpack without rushing. If sunset is around 5 pm, aim to be on site by 3 pm.
- Light the stove first, then settle in. Get the fire going the moment you arrive so the dome warms while you organize gear, make tea and explore the property in the remaining light.
- Confirm check-in times with your host before you travel. Winter access roads may close early in heavy snow, and some hosts adjust handover hours in bad weather. A short message a day ahead saves a cold wait at a locked gate.
- Do your outdoor activities in the morning. Hikes, sightseeing and photography trips belong in the brightest hours; leave the afternoons for a slower pace and shorter walks near the accommodation.
- Reserve evenings for the fire. Once dark falls, let the fire pit, stove and hot tub do the work. Nights indoors are half the appeal of winter glamping, so plan for them rather than fighting the darkness.
The rhythm takes one evening to learn and pays off for the rest of the trip. Guests who arrive early, light the stove promptly and front-load their activities consistently report more relaxed stays than those who treat a winter dome like a summer campsite. The difference comes down to simple sequencing: warmth first, logistics second, leisure last. If you arrive late and cold, everything else feels like a chore, from cooking dinner to finding dry socks.
It also helps to build in a buffer for winter driving. Icy roads, slow plows and unfamiliar gravel tracks can all add time to a journey that looked easy on a map. Check the forecast before you leave, keep fuel topped up and tell your host if you expect to run behind. Build your days around the light, and the darkness becomes a feature instead of a problem.
Your Warm Winter Escape, Wrapped Up
If the idea of a snowy luxury escape appeals to you but you worry about freezing after dark, here’s the good news: it doesn’t have to be that way. Winter glamping typically runs December through February, and it rewards early planners who book 2-3 months out. A four-season stay, layered clothing and a safe wood stove keep nights comfortable even at -20°C (-4°F). Add an insulated sleeping setup, and you’ll stay warm until morning without a single chill.
With smart timing and the right gear, a snowy glamping trip can be as cozy as any hotel winter break — with better views and a fire pit of your own. Have you tried glamping in winter, or are you planning your first snowy escape? Leave a comment below or share this article with a friend who needs a cozy getaway.